
Since we’ve been spending a lot more time at home for the past four months, there has also been a lot more home cooking. Also, when all the stuff started hitting the fan, I went to Sams and stocked up on meat to portion out and put in the freezer. This seems like excellent planning until I remember that I am, in fact, me…and I never remember to thaw things out in time to have that night. Toward the beginning of Stay at Home I was pretty good about it, but as time went on my natural tendencies kicked back in.
One of my friends a while back told me about their sous vide, or precision, cooker. Seems like this would be the perfect time to try it out, so off to Amazon I went! I got the Anova one because it was the same one my friend had. The first thing I tried with it was rib eye steaks. I just set the temp that I wanted the centers to be when they were done and left it for a couple of hours. When I was ready for dinner I just popped open the bags and gave the meat a quick sear on the outside. They were perfect! Cooking low and slow for so long made them super tender and the fact that they cooked in their own juices made them super, well…juicy!
When I did the steaks, I had been responsible and actually remembered to thaw the meat before cooking. The next time I used my magic device, I had not planned so well. We had one of the kids’ friends come over in the morning after swim practice and I remembered that I would have to feed these kiddo’s lunch. I’m tired of running out for fast food, so I ran off to the freezer and grabbed a bag of frozen chicken breasts. Three hours at 160 degrees and right at lunch time I had lovely, moist chicken breast ready to slice up on to sandwiches or salads! As I said, this thing is magic. A couple of days ago, I grabbed two frozen, marinated pork tenderloins out of the freezer. Best ever! Those I threw under the broiler after cooking just to get a little more “roasted” flavor on the outside, but I think I want to buy a kitchen torch next so I don’t have to mess up a pan to broil or sear the meat. It’s not terribly pretty when it comes out of the sous vide bag.
My latest sous vide adventure was a pot roast. Here’s the deal, my mother-in-law makes the best, fall-apart pot roast you will ever eat. She’s told me how she does it and all the ingredients, but I have NEVER managed to pull it off in the slow cooker. My gravy is just as good, but the meat is never as tender. Sous vide to the rescue! I grabbed my meat (thawed this time) and added a packet of onion soup mix to the bag, sealed it and threw it in the cooker at 150 degrees. There it remained for 24 hours.
A couple of hours before dinner, I threw some beef broth and mushroom soup into a stock pot. I cut open the bag that the meat had been braising in and dumped those juices into the pot as well. Don’t want to waste any of that good flavor or the seasonings! I went to cut up the meat and add it to the gravy, but realized at that point, cutting wasn’t really necessary. It was so tender I could just pull it into chunks! Left all that to simmer until just before dinnertime when I added some cornstarch to thicken the gravy. Served it with rice, green beans, and rolls. The family devoured it and declared it just as good as Mimi’s! But here’s the deal, we will NEVER tell Mimi because hers is the original and made with massive amounts of love. It’s just good to know that I can pull it off as back up!
Now, here’s the problem. I’m a really bad blogger and forgot to take pictures of the finished product! So, I’ll just promise you that it’s delicious. Besides, pot roast isn’t all that pretty, it just tastes amazing.
Ingredients:
Chuck roast, Lipton Onion Soup Mix (1 Packet), 32 oz. Swanson Beef Stock, 2 cans Campbells Cream of Mushroom Soup, Corn Starch.
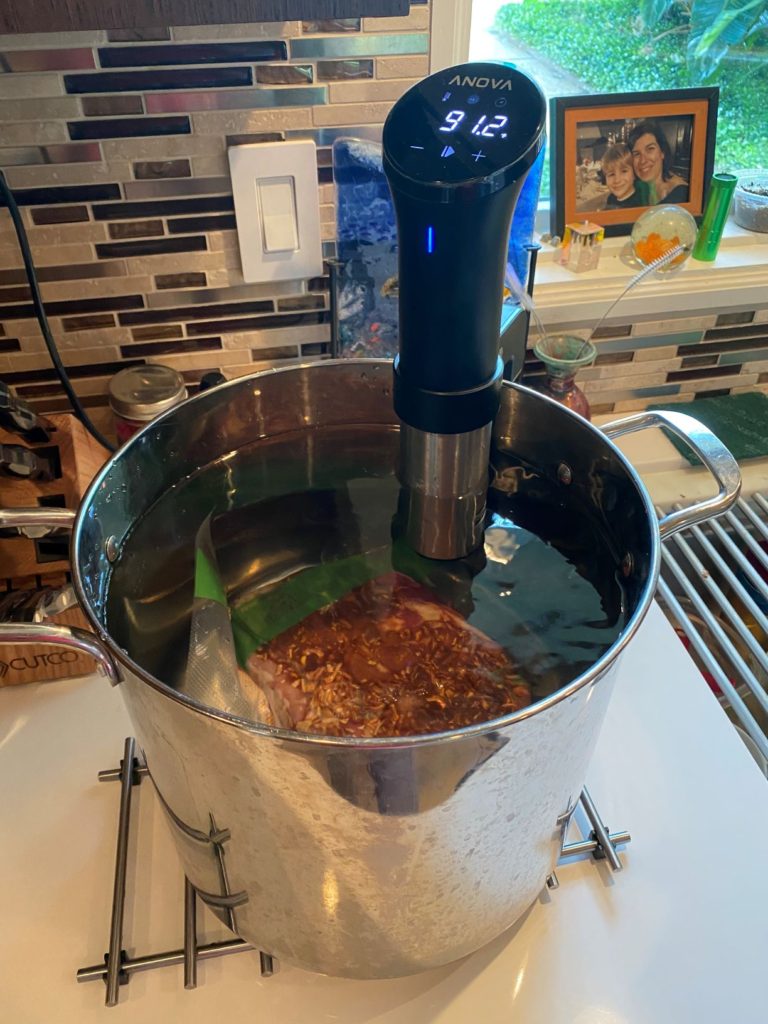
Take the roast and coat both sides with the soup mix and seal it into a vacuum bag. (Did I mention that when you are doing sous vide, having a vacuum sealer is pretty important?) Place the bag in your water basin (I just use a big old stockpot) and set the precision cooker to 150. Leave it going for the next 24-48 hours. You will have to check back and top off the water a few times during the process, but seriously, there’s no other work.
An hour or two before serving, add the stock and the mushroom soup to a pot and blend well over medium low heat. You want to simmer this, not boil it. If it starts to boil, lower your temperature. Add the meat and the juices from the bag. About 1/2 an hour before serving, whisk in the cornstarch until there are no lumps and continue simmering. You could also use flour to thicken the gravy.
That’s it! So easy!